Welcome To The Shakin 'N Bakin Blog!

Welcome to my blog! I love to cook and bake for my family. I hope you enjoy the recipes, foodie reviews, foodie giveaways and cooking tips posted on my blog.

How to Print Recipes: You can print out each individual recipe featured on this blog by clicking the "share" button at the bottom of each post. It will open up to show you options, click on print and another window will open up with the recipe inside it for printing. You can also use the SHARE button to email a copy of the recipe to yourself for printing later.

Showing posts with label Candy Recipes. Show all posts

Tuesday, September 25, 2018

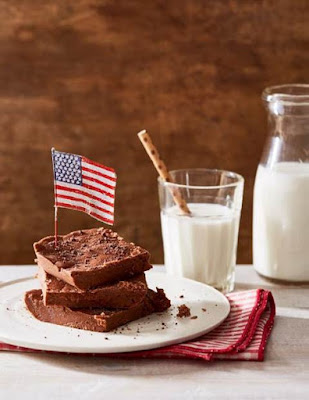
American Heritage Chocolate Fudge Recipe

When visitors flock to some of America’s most iconic historic venues this summer, they’ll learn much about our nation’s history but also have the opportunity debunk the many legends and myths about chocolate. For example, did you know that cacao beans were used as form of currency dating back to the Aztec Empire, Christopher Columbus discovered America AND chocolate, bringing cacao beans back to the Spanish court in the early 1500s, George Washington drank “chocolate cream” at breakfast, Benjamin Franklin sold chocolate in his print shop, or chocolate has traditionally been included in military provisions throughout history?

This recipe is courtesy of American Heritage and will make approximately 60 small squares of chocolate fudge.

American Heritage Chocolate Fudge Recipe

American Heritage Chocolate Fudge Recipe

2 cups granulated sugar
1/2 cup AMERICAN HERITAGE® Chocolate Drink Mix
Butter the size of a large egg (about 4 tablespoons, with extra to grease the pan)
1 cup milk

"Boil until it's sugary on the sides of the pan and puffs up and is thick," is all the undated manuscript offers. We offer the following elaboration: Combine sugar, milk and AMERICAN HERITAGE® Chocolate Drink Mix in a medium saucepan, stirring constantly. Bring to a boil. Reduce heat and simmer.

To check if it's done, drop a small ball into a bowl of cold water. It should form a soft ball. Or use a sugar thermometer and cook until 240 degrees F. Remove from the heat and beat well with a spoon. The mixture should be very thick and about to set. Pour into a greased 8x8-inch baking pan and let cool. Cut into squares and serve.

AMERICAN HERITAGE Chocolate is an authentic historic chocolate made from ingredients available in the 18th Century. The recipe repre­sents a true taste of chocolate the way our ancestors would have enjoyed it. Made with all-natural ingredients and no preservatives, AMERICAN HERITAGE® Chocolate comes in four unique formats: chocolate sticks, chocolate bites, chocolate baking/grating blocks, and finely grated chocolate drink mix.

Tuesday, October 11, 2016

No-Bake Cherry Crème Filled Dark Chocolate Bites Recipe

Yes, I know it's only October but I'm already starting to think about the quickly approaching holiday season. Every holiday season I make and bake a wide variety of cookies, pies, cupcakes, creamy fudge, bon-bons and all kinds of other delicious treats. I make them for the various holiday parties that we host and I like to give them as holiday foodie gifts too!

The great folks over at Sparkling ICE sent over this recipe for me to share with all of you. One of the things I like about this recipe is that it requires no baking and it includes one of my favorite foods, chocolate! As an added bonus, it's easy to prepare! This recipe is definitely on my to-do list for sure!

No-Bake Cherry Crème Filled Dark Chocolate Bites Recipe

1 1/4 cups powdered sugar
2 oz cream cheese, softened
1 teaspoon Sparkling Ice® Black Cherry
2 tablespoons chopped dried sweet cherries
1 cup dark semisweet chocolate chips (60% cacao)
Toppings: Chopped pistachios, chopped almonds, coconut and chopped dried sweet cherries

In small bowl, combine powdered sugar, cream cheese and Sparkling Ice® Black Cherry, mixing to combine. Add dried cherries, mixing well to incorporate. Cover and refrigerate mixture for at least 1 hour; remove from fridge. With spoon or buttered hands, drop slightly less than ½ tablespoonful onto parchment-lined baking sheet and freeze for 30 to 45 minutes. (Mixture will be sticky.)

Melt chocolate per package microwave directions and set aside. Remove 1 to 2 frozen cherry fillings from the freezer at a time, and using toothpicks or 2 forks, dip each frozen filling into the chocolate to cover, shaking excess chocolate off. Place on parchment and top as desired. Continue for remaining chocolate bites. Refrigerate for 1 hour before serving.

Monday, September 26, 2016

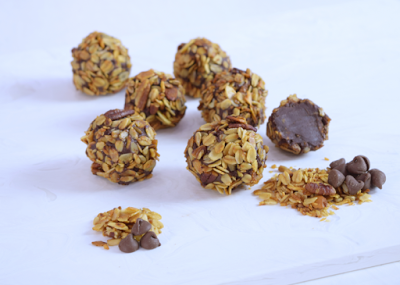
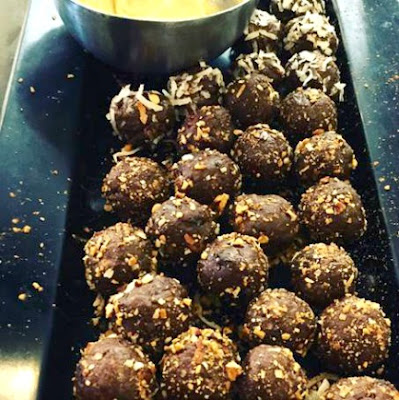
Granola Truffles Recipe

If you're in need of some summer sweets and want something super easy-to-make, I think you'll appreciate this guest post recipe that is courtesy of Viki's Original Granola. You'll only need 4 simple ingredients to make them and they taste absolutely delicious! Viki's Original Granola is a blend of gluten-free oats, organic honey, almonds, pecans and unsweetened coconut. It is simply, the best tasting, good for you granola.

Granola Truffles Recipe

1 2/3 cups heavy cream
7 tablespoons unsalted butter
1 pound semisweet chocolate, cut or broken into shards
Viki's Granola for rolling truffle

Place cream and butter into a saucepan. Allow butter to melt on medium heat, stirring the whole time. Raise the heat just until the cream mixture comes to a boil. Remove saucepan from heat, add the chocolate and stir until it is completely melted. Continue stirring until the mixtures thickens and cools a bit. Cover mixture with cellophane and place in refrigerator. Allow at least 2 hours to cool and thicken for at least 2 hours but mix 3 to 4 times during that time.

To form truffles use a small melon baller or spoon to scoop chocolate mixture into the palm of your hand. Roll into a ball then roll in your favorite Viki's Granola. Place completed balls on a parchment-lined tray and refrigerate before serving.

Monday, August 29, 2016

Granola Munchkins Recipe - Delicious and Easy-to-Make

My 7 year old granddaughter was over last weekend for a visit and she loves to be in the kitchen with me. We decided to make Viki's Granola Munchkins Recipe as a special treat for our movie night. This recipe is very easy-to-make and you only need 3 ingredients to make it. Regarding prep time, about 5 minutes, then an hour of refrigeration time and then another 10-12 minutes to roll the dough into balls. Once they've been prepared, place them into an airtight container and store them in the refrigerator.

Note: My mom has made this recipe in the past and has used almond butter instead of peanut butter and loves it made that way too. So, whatever your favorite nut butter is...you could probably use it to make the recipe.

Granola Munchkins Recipe

3 cups Viki's Granola (any variety)
½ cup of smooth peanut butter
½ cup of mini chocolate chips

Combine all ingredients in a mixing bowl, chill for 30-40 minutes in the fridge, then roll into balls. Store in an airtight container in the fridge.

We love this granola! It's a blend of gluten-free oats, organic honey, almonds, pecans and unsweetened coconut. You can use it in various recipes or just snack on it straight from the bag. You can learn more about Viki's Original Granola by visiting the company's site online.

Disclosure: Shelly H. received 2 complimentary bags of Viki's Original Granola to thank her for featuring the company & product here on her foodie blog. No monetary compensation was received.

Wednesday, May 18, 2016

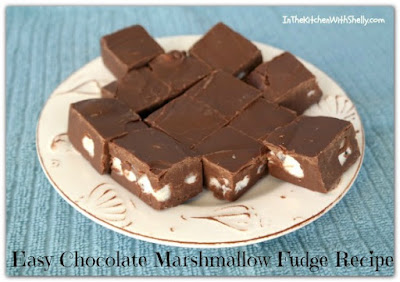
Easy Chocolate Marshmallow Fudge Recipe

I love to make homemade fudge! I probably make up a pan of fudge every month for my family to enjoy. On top of that, when our church holds their bi-annual bake sale...I whip up several batches of fudge for that! Making fudge is NOT a hard process and it works up super quickly with this easy recipe.

Easy Chocolate Marshmallow Fudge Recipe

2 cups semi-sweet chocolate chips (or) milk chocolate chips
2 tbsp. creamy peanut butter
16 oz. tub prepared chocolate fudge frosting
1 1/2 cups. miniature marshmallows

Prepare an 8" square baking dish by lining it with a piece of aluminum foil or by lightly greasing it with butter. Set aside.

In a large saucepan over low heat...combine and melt together the semi-sweet chocolate chips with the 2 tbsp. of creamy peanut butter. Stir constantly until smooth. Remove from heat and stir in the tub of chocolate fudge frosting until well-combined and melted. Stir in the miniature marshmallows until combined. Pour mixture into your prepared 8" square baking dish. Cover and place into the refrigerator for 2-3 hours or until firm. Remove and cut into squares.

Note: Fudge freezes well. Just wrap each piece of fudge in plastic freezer wrap or waxed paper and then place the squares into a freezer container or freezer bag. Will keep for up to 2 months.

Sunday, May 15, 2016

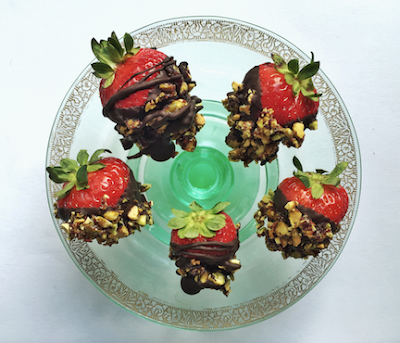
Pistachio and Chocolate Dipped Strawberries Recipe

I love chocolate dipped strawberries and right now strawberries are finally coming into season here on the east coast. Now is the time to buy fresh ones at a great price and enjoy them! You can easily make your own at home which save you money and trust me, homemade always tastes a lot better than store bought!

Looking to make some? Check out this recipe courtesy of Pistachio Chewy Bites. It will make 4-6 servings. Visit their web site to learn more about their foodie products and to pick up some additional easy-to-make recipes.

Pistachio and Chocolate Dipped Strawberries Recipe

4 Setton Farms Pistachio Chewy Bites
12-14 fresh strawberries, washed and dried
1 cup dark chocolate chips
2 teaspoons cocoa powder
2 teaspoons refined coconut oil
Dash sea salt
1Ž4 teaspoon ground cinnamon

Finely chop Setton Farms Pistachio Chewy Bites and set aside. In a double boiler add chocolate chips over medium heat. Or fill a 2 quart pot with 1 inch water, covered with a heat-proof bowl. Place chips in bowl and allow chocolate to melt, about 5 minutes.

Whisk in cocoa powder, coconut oil, sea salt, and cinnamon. Smooth with a spatula until uniform and lower heat to a simmer. Dip strawberries into chocolate mixture and transfer to a baking sheet, lined with parchment or wax paper. Sprinkle generously with chopped Setton Farms Pistachio Chewy Bites.

Let cool for about 10 minutes, and then transfer to refrigerator for about 1 hour to overnight to set up before serving.

Monday, April 4, 2016

Bite-Size Chocolate Pretzel Treats Recipe

Last month my mom had to whip up something quickly for my grand daughter's Girl Scouts meeting and needed it to be a finger-food and something that was bite-sized. After looking around the internet she found a recipe to make bite-sized chocolate pretzel treats and let me tell you, they were a huge hit with the girls.

It took my mother less than one hour to make and we had all of the ingredients on-hand. Matter of fact, you only need three ingredients to make them! She has made them several times now and uses Hershey's Kisses (plain) and Hershey's Hugs (white chocolate) when she makes them. Both are delicious!

If you're making them around a particular holiday, pick up M&M candies in holiday colors. They're great for holiday parties and family get-togethers too! The kids just love them!

Chocolate Pretzel M&M Treats Recipe

1 bag of thin, small pretzels
1 bag of Hershey's Kisses (Regular and/or Hugs)
1 bag of plain M&M Candies
non-stick baking spray or aluminum foil

Preheat oven to 350 degrees F. Line a baking sheet with aluminum foil or lightly spray it with non-stick baking spray.

Place the pretzels on the baking sheet about 1" apart. Place one unwrapped Hershey's Kiss on the center of each pretzel. Place baking sheet into a preheated oven for 30 to 45 seconds, just long enough for the chocolate to get very soft, but don't let it completely melt!

Remove baking sheet from the oven and let stand for 1 minute at room temperature. Push one or two M&M candies on top. Let stand at room temperature until cool. Store in an airtight container.

Monday, January 4, 2016

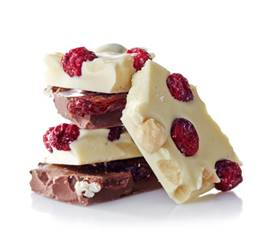
Cranberry Orange Almond Bark Recipe

How many of you enjoy a good homemade candy bark? I know I do! I make them from time to time but not as often as I would like. Well today, I'm sharing with all of you a guest post recipe courtesy of Cookina. That bark looks delicious!

COOKINA®'s Non-Stick Cranberry Orange Almond Bark Recipe

1 lb. Chocolate of your choice (can be white, milk or dark)
1 cup Almonds, toasted
½ cup Dried cranberries
½ cup Candied orange peel

In a medium sized microwaveable bowl, microwave chocolate on medium in 45 second intervals, stirring after each until chocolate is almost completely melted. Continue to stir until all is melted and chocolate is smooth. Stir in nuts, cranberries and orange peel.

Quickly pour the mixture onto a baking pan lined with a COOKINA® Cuisine Reusable Baking Sheet and spread it out evenly with a spatula. Refrigerate until firm. Break in to pieces and ENJOY!

Disclosure: You can visit Cookina online to learn more about their products and to pick up additional free recipes.

Sunday, December 6, 2015

No Bake Toasted Coconut Chocolate Bonbons Recipe

The holidays are quickly approaching and many of us will be attending holiday parties or hosting one ourselves. On top of that...many of us like to make homemade foodie items and give them as holiday gifts. At least...I know all of those apply to me! These look absolutely delicious!!!

Today I'm sharing a guest recipe with all of you courtesy of VeganFusionAcademy.com. You can visit their website to learn about their new Vegan programs and to gather additional information about them. The following recipe makes 15 bonbons.

No Bake Toasted Coconut Chocolate Bonbons Recipe

2 cups vegan dark chocolate chips
1/2 cup raisins
1/4 cup chopped pecans or macadamia nuts, toasted
1/2 cup coconut flakes, toasted
1/4 cup almond or peanut butter
2 tablespoons maple syrup
1 teaspoon vanilla extract
1/8 teaspoon ground cinnamon
Pinch cardamom powder

Place chocolate chips in double boiler on medium high heat until chips are melted, stirring frequently. Place in a large bowl. Set aside 1/4 cup of the toasted coconut to sprinkle on top of cookies. Add remaining ingredients to the melted chocolate and mix well.

Measure out 15 servings with a small scoop, roll into balls and place on a parchment paper lined or well oiled baking sheet. Top with remaining .cup coconut. Refrigerate until cool and serve slightly chilled or at room temperature.

Saturday, May 23, 2015

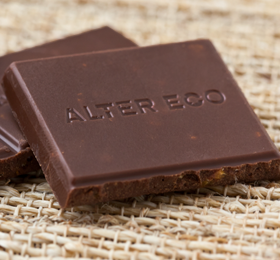
Alter Eco Dark Salted Burnt Caramel Organic Chocolate

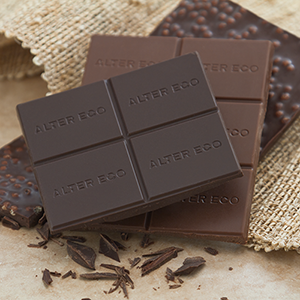
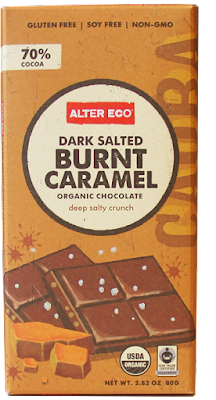
Alter Eco, a pioneer of globally crafted foods, recently launched its Dark Salted Burnt Caramel chocolate bar, a smooth Ecuadorian chocolate atop an alluring, deep caramel crunch that’s sprinkled with sea salt for an irresistible indulgence. Like all Alter Eco products, the new bar is free of gluten, emulsifiers, artificial flavors and soy and is USDA Certified Organic, Fair Trade Certified, Carbon Neutral Certified and Non-GMO Project Verified.

Like most people in the world, I absolutely LOVE chocolate! Seriously, I think I eat something with chocolate in it or a candy bar...every day. Yup, I am officially a chocoholic!
Recently I received two 2.82 oz. chocolate bars from Alter Eco to try out for all of you and after just one bite...I was in pure chocolate heaven!!! Each of these bars contain two servings of 5 chocolate sections each. Furthermore, each serving is only 230 calories each.

Usually I am greedy when it comes to my chocolate but I was feeling generous and decided to share with my husband and mother. I know...don't faint...I shared! LOL

The Dark Salted Burnt Caramel Organic Chocolate bars have a deep salty crunch that is well-balanced with the sweet caramel. It's the perfect marriage between sweet and salty. Sometimes dark chocolate can taste bitter but with the additions of the burnt caramel and salt...this chocolate bar is sweet but not overly-sweet.
The texture, taste and oh-so-good melt factor are just perfect! I love to break off one section at a time and let it gently melt in my mouth. Oh my gosh...so good, so satisfying! This chocolate bar is a real winner!!!

Head on over to Alter Eco and take a look around. You can learn more about the company and the product that I reviewed by visiting their site online. I highly recommend that you give these chocolate bars a try! I am glad that I did.

Disclaimer: Shelly H. has personally reviewed the product listed above. Shelly has not received any monetary compensation for her review. Shelly did receive a free product to try out so she could evaluate and use it for her review. Her thoughts & opinions in this review are unbiased & honest and your opinions may differ. The Shakin N Bakin Blog is not responsible for delivery/shipping of giveaway items won from this blog nor are we responsible for mis-use or injury caused by items won from this Blog. Content on this blog is copyrighted, all rights reserved. We reserve the right to legally pursue anyone who violates our rights and/or steals our copyrighted material.

Sunday, February 15, 2015

Sugar-Free Berry Bliss Chocolate Bites Recipe

Searching for a last minute Valentine’s Day dessert recipe? Look no further. Love is in the air with Carrington Farms Berry Bliss Chocolate Bites!

Created by leading organic health food company, Carrington Farms, this simple, no bake dessert is a sweet treat that will make any chocolate lovers mouth water. And, the best part is, this decadent treat gets its sweetness from real fruit, making it a healthier for you splurge.


Sugar-Free Berry Bliss Chocolate Bites Recipe

9 tbsp Carrington Farms Coconut Oil
3 tbsp Hershey’s 100% unsweetened Cacao Powder
3-4 packets (less or more depending on you) Stevia in the raw
1/2 cup frozen berries (We suggest an antioxidant blend with strawberries, pitted cherries and pomegranate seeds by market pantry from Target)
Silicone candy mold or mini baking cups

1. Mix the melted coconut oil with cacao powder and stevia.
2. Chop the frozen berries into smaller pieces and distribute among 9 baking cups.
3. pour 1 tbsp chocolate mix into each cup over the frozen berries. Place in freezer until set, 5-8 minutes and enjoy!

Wednesday, October 22, 2014

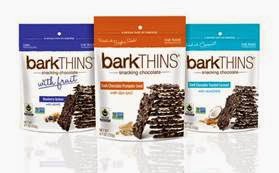
barkTHINS Snacking Chocolates - Just Perfect!

How many of you have heard of barkTHINS snacking chocolates and have tried them? I am ashamed to say, I had never heard of them until this review and wow...I was really missing out on a wonderful chocolate sensation!

Since making their debut at last year's Summer Fancy Food Show, barkTHINS snacking chocolate by the ripple brand collective has been a big hit! They are a revolutionary new twist on bark chocolate that is totally taking the industry by storm.

barkTHINS are non-GMO project verified, fair trade ingredient certified and contain no artificial colors or flavors. They are packaged in 4.7 oz. re-sealable gusseted bags and are available in several delicious flavors, including limited-edition seasonal flavors too! They are seriously good!

Flavors:

* Dark Chocolate Coconut Almond
* Dark Chocolate Almond
* Dark Chocolate Pretzel with Sea Salt
* Dark Chocolate Blueberry Quinoa
* Dark Chocolate Pumpkin Seed
* Dark Chocolate Mint

For my review, I received 3 complimentary bags of barkTHINS snacking chocolates to try out for all of you. I got a bag of: Dark Chocolate Pumpkin Seed with Sea Salt, Dark Chocolate Almond with Sea Salt and Dark Chocolate Pretzel with Sea Salt.

I really had a hard time deciding on which flavor to try first but finally decided on the Dark Chocolate Pretzel with Sea Salt. Oh my gosh...just one bite and I was totally hooked on them! Usually I am a milk chocolate girl but found them to be divine! They are the perfect combination of dark chocolate, crunchy pretzels and sea salt. I think the sea salt cuts down the bitterness that you usually find with dark chocolates.

The following day we had a few friends over for a little get-together and I placed each of the other two flavors (Dark Chocolate Pumpkin Seed and the Dark Chocolate Almond with Sea Salt) in little glass crystal serving bowls so that my guests could snack on them after our dinner. None of my guests had ever heard of them before this and were pleasantly surprised at how great they tasted. Within 2 hours, my dinner guests had both of the bowls devoured!

Out of those two flavors, I only had the chance to try out the Dark Chocolate Pumpkin Seed which I really loved! With that said, out of the 2 flavors I tried, I would have to pick the Dark Chocolate Pretzel with Sea Salt as being my absolute favorite but hubby has a different opinion and really loved the Dark Chocolate Almond with Sea Salt as his ultimate favorite.

Head on over to barkTHINS to learn more about the company and their products. You can also follow the company on Facebook and on Twitter.

Disclaimer: Shelly Hill has personally reviewed the product listed above. Shelly has not received any monetary compensation for her review. Shelly did receive a free product to try out so she could evaluate and use it for her review. Her thoughts & opinions in this review are unbiased & honest and your opinions may differ. The Shakin N Bakin Blog is not responsible for delivery/shipping of giveaway items won from this blog nor are we responsible for mis-use or injury caused by items won from this Blog. Content on this blog is copyrighted, all rights reserved. We reserve the right to legally pursue anyone who violates our rights and/or steals our copyrighted material.

Monday, September 22, 2014

STONERIDGE ORCHARDS Dried Cherry Fruit Snacks

My husband and I are big snackers. We love to snack on all kinds of different things from gourmet popcorn to dried fruits. Obviously, some of our snacks are more healthier than others. But hey...everything is moderation, right?

Today I am excited to introduce you to STONERIDGE ORCHARDS who sent us some delicious dried cherry snacks to review for all of you. The company is the leading brand of premium dried whole Montmorency Tart Cherries. With farms & orchards in Washington State, the STONERIDGE ORCHARDS brand is a part of Royal Ridge Fruits, third-generation growers of cherries, blueberries, raspberries and other premium dried fruits and berries that preserve natural goodness and flavor. The company never uses sulfites, high-fructose corn syrup, hydrogenated oils or artificial preservatives.

The company sent us 3 bags of their premium dried cherry fruit snacks to review for all of you and here is what we received and a little bit about each one.

* Chili Lime Cherries with Tajin - Stoneridge Orchards created this entirely unique & surprising product by flavoring its whole, all-natural dried Montmorency Tart Cherries with just the right amount of all-natural Tajin chili lime seasoning. Tajin is made from only 3 ingredients (premium chilies, dehydrated lime juice and sea salt).

* Chocolate Dipped Cherries & Greek Yogurt Dipped Cherries - As the name states, these premium Montmorency Cherries are dipped in either the dark chocolate or the All-Natural Greek Yogurt. All of the Stoneridge Orchards' dipped products are made with whole fruits, not a mixture of juice and pectin. They come packaged in a re-sealable bag which is nice!

I hosted a little outdoor end of Summer party this past Saturday and decided to sit out these fruit snacks in little bowls for my dinner guests to enjoy. I placed the empty bags near each bowl so they could see the flavors and learn more about the products they were snacking on.

My husband was immediately in love with the Dark Chocolate Dipped Cherries! Matter of fact, I had a hard time getting him to share them with others who were visiting with us. These chocolate dipped cherries are plump with lots of dark chocolate. The perfect blend of tart cherry with dark chocolate made for a combination that became quite addictive!

My favorite was the Greek Yogurt Dipped Cherries and like my husband...I really didn't want to share them with anyone, but I did. They are rich, creamy and the perfect blend of tart cherry dipped in that delicious Greek Yogurt. Trust me, you can't eat just one!

My husband's best friend loves foods with a little spicy kick. He was all over those Chili Lime Cherries with Tajin. They are NOT overly spicy at all. I would consider them to be very "mild" with a slight zesty flavoring to them which is mellowed out by the tart cherry. I think all of the guys here at our dinner party gravitated towards those except for my husband who is a dark chocolate fan.

All three varieties were delicious and I would NOT hesitate in purchasing them. Matter of fact, we plan on buying more! Yes, they are that good!

Head on over to Stoneridge Orchards and take a look around. You can learn more about the company and the products that they have to offer.


Disclaimer: Shelly Hill has personally reviewed the product listed above. Shelly has not received any monetary compensation for her review. Shelly did receive a free product to try out so she could evaluate and use it for her review. Her thoughts & opinions in this review are unbiased & honest and your opinions may differ. The Shakin N Bakin Blog is not responsible for delivery/shipping of giveaway items won from this blog nor are we responsible for mis-use or injury caused by items won from this Blog. Content on this blog is copyrighted, all rights reserved. We reserve the right to legally pursue anyone who violates our rights and/or steals our copyrighted material.

Wednesday, August 6, 2014

Chocolate Peanut Butter Crunch Mix Recipe

A few months ago I received a cookbook for review called 250 Best Meals in a Mug by author Camilla V. Saulsbury and published by Robert Rose Books. This cookbook contains 250 easy recipes that can be made in a mug or large measuring cup in your microwave oven! I love this book and use it all of the time to whip up delicious soups, meals, breakfast and snacks for my family.

Today I wanted to share a recipe with all of you from page 58 in the book and it only uses 4 basic ingredients that you probably already have in your home. If not, all of them are found in your local grocery store. You can purchase this fabulous cookbook directly from Robert Rose. I highly recommend it!

Chocolate Peanut Butter Crunch Mix

1/4 cup semisweet chocolate chips
1 Tbsp. creamy peanut butter
1 Tbsp. butter
1 cup corn, rice or wheat cereal squares

Note: We used Rice Krispies instead of the author's recommendations.

Line a dinner plate with waxed paper or aluminum foil. You will be using this surface once you have everything prepared.
In a large mug (I used a large two cup measuring cup) microwave the chocolate chips, peanut butter and butter on high for 45 seconds. Stir. Microwave on high for an additional 15 to 45 seconds or until everything has melted and is smooth when stirred.

Immediately stir in the cereal until it has been well-coated. Spread mixture onto your prepared surface (see above). Refrigerate for 20 minutes or until firm. Break into small pieces and store in an airtight container or snack bag.

Note: You can print out this recipe by clicking on the "share" button located at the bottom of this post. Once you click on the button, find the PRINT button and the recipe will load into a new window for printing.

Sunday, April 13, 2014

Chocolate Mocha Cappuccino Fudge Recipe

I love making a wide variety of fudge, especially the less common flavors. Since I am a big coffee drinker, this mocha cappuccino fudge is one of my favorites! It has the perfect blend of chocolate, coffee and vanilla. If you have an upcoming school bake sale where a lot of adults will be purchasing bake sale goodies, this fudge is a great one to make. In addition, once prepared & cooled, it freezes well for later use...up to 1 month in the freezer!

Mocha Cappuccino Fudge Recipe

3 cups semi-sweet chocolate chips
1 can sweetened condensed milk (14 ounce)
1/4 cup chocolate flavored syrup
1 Tbsp. instant coffee
1/4 teaspoon ground cinnamon
1/2 teaspoon vanilla extract
Non-stick cooking spray

Place ingredients in a 2 1/2 qt. saucepan over low heat. Stir constantly until the semi-sweet chocolate chips are melted and mixture is smooth. Remove from heat. Spread in a 9" round pan or a 8" square baking pan that was sprayed with non-stick cooking spray. Cover and chill for 2 hours or until firm and then cut into bite size squares.

Sunday, March 2, 2014

JOLLY TIME Cocoa Popcorn Crunch Recipe

We love popcorn and make a big batch of it every week. Sometimes we get bored having the same old thing so a few weeks ago I found the JOLLY TIME Cocoa Popcorn Crunch Recipe online and just had to make it! You can go on over to the JOLLY TIME web site and find all kinds of great recipes that utilize their delicious popcorn!

This recipe has quickly become one of our favorites and the kids just love it! Sometimes we toss in a handful of chopped peanuts, chopped pecans or some mini marshmallows into the popcorn before pouring the chocolate over the top. It is super delicious!

JOLLY TIME Cocoa Popcorn Crunch Recipe

3 cups granulated sugar
1/2 cup unsweetened cocoa powder
1 cup milk
2 tablespoons vanilla extract
6 quarts of popped popcorn

Pop 6 quarts of JOLLY TIME popcorn and set aside. Line your counter top with waxed paper or foil, I use foil personally as I am not a fan of waxed paper. In a medium saucepan combine together the granulated sugar, cocoa powder, milk and the vanilla extract. Boil for 3 minutes or until a candy thermometer reaches 250 degrees. (note: I don't use the candy thermometer but found if I boil for 3 minutes it works out perfectly). You will need to stir the mixture constantly while it is boiling.

Pour the hot cocoa mixture over the popped popcorn that you have sitting in a large bowl. It will be hot so be careful. Use a spoon to stir the mixture together until the popcorn is completely coated. Spread the mixture onto the foil lined counter top or baking sheet. Use a spoon or spatula to flatten it out. Let it cool to firm up. Once cool & firm, break it a part into smaller pieces and place into a container for storage.

Note: You can print out this recipe by clicking on the "share" button located at the bottom of this post. Once you click on the button, find the PRINT button and the recipe will load into a new window for printing.

Friday, February 7, 2014

Valentine's Day Gifts from Old Time Candy

Valentine's Day is a week away and I have been really thinking about what I would like to get for my daughter and husband this year for Valentine's Day in regards to candy. After thinking about this for a few days, I decided that 1980's candy would be the perfect choice!

Why you might ask? Well, my husband and I were both in our early 20's during the 1980's and consider ourselves to be from the 80's generation. In addition, we had our first child in the mid-80's and she grew up enjoying those same candies that we did.

There is an online store called Old Time Candy where you can find hundreds of different types of candies and you can shop by the decade. I was easily able to find the 1980's section and wowza, they have a super large selection of goodies to choose from.

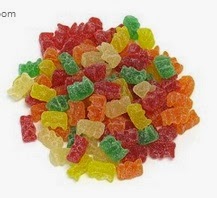
My husband has always enjoyed those classic Gummi Sour Bears and I found those on their site! You can buy them by the individual bag, by the 2-lb. box, 5-lb. box or get the mother-load 30-lb. box so that you don't run out any time soon!

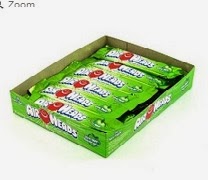
Our daughter was a HUGE fan of the Airheads and they got several different flavors of Airheads in-stock and ready-to-ship. They have blue raspberry, green apple, cherry, pink lemonade, white mystery and watermelon or you can go for a variety box. I am thinking about the variety box for our family that way we all can enjoy our favorite flavors.
Right now Old Time Candy is running a Valentine's Day promotion where you can send your favorite Valentine some vintage candy and save 10% on All Orders until Feb. 28th, 2014. Just use the promo code VALENTINE10 during the checkout process to receive your discount.

When it comes to classic candy...which ones are your favorites? I would love to hear about it so leave your comments below. Thanks!

Disclosure: "This post was created in partnership with eAccountable. All opinions are my own."

Saturday, December 14, 2013

Elaine's Toffee Company - Gourmet Toffee Gifts + Giveaway

How many of you love gourmet toffee? If you do, I got a great treat for all of you today! The Elaine's Toffee Company is based out of the great state of California and is made the old-fashioned way, one small batch at a time.

Elaine and her husband started making English toffee over 30 years ago for their family and friends. Over the years their toffee was in demand and they started making it for others. Over the years they taught their daughters how to make it and decades later the company was born.

When you shop at Elaine's Toffee Company you will find gourmet English toffee products like: Toffee Sauce, Dark Chocolate Toffee Nuggets, Milk Chocolate Almond Toffee, Toffee Squares, Sugar-Free Toffee and more! It's a toffee lover's paradise!

For my review I was sent three products to try out for all of you. I got a jar of the Toffee Sauce, a bag of the Dark Chocolate Toffee Nuggets and a package of the Milk Chocolate Almond Toffee.

I had never had Toffee Sauce before but now that I have tried it, I love it! I used this sauce in some of my hot coffee, hot cocoa and I warmed up some in my microwave oven and spooned it over some vanilla bean ice cream. Super delicious and I actually prefer the toffee sauce more than hot fudge sauce!

The Dark Chocolate Toffee Nuggets are the perfect bite-sized pieces for snacking. I placed these in my candy dish and my husband & daughter couldn't keep their hands out of it. Matter of fact, in less than 24 hours my candy dish was completely empty and they didn't save any for me.

The Milk Chocolate Almond Toffee kind of reminds me of a peanut brittle but better! I loved the combination of flavors with this one (caramel, vanilla and almonds) which were perfectly blended together. We had a few friends over the other day and I simply placed this on a small serving plate and by the end of the evening...it was gone! Delicious!

All three of the products we tried from Elaine's Toffee Company were delicious! They all come individually packaged so you can pick up a few to give as gifts or to stock your pantry for when you are entertaining. All are affordably priced and can be shipped straight to your home or office.

Giveaway: One lucky winner is going to win: (1) jar of the the Toffee Sauce, (1) bag of the Dark Chocolate Toffee Nuggets and (1) pkg. of the Milk Chocolate Almond Toffee. Yay!

CLOSED! Winner has been notified via email.

Giveaway Details: This giveaway is open to residents of the USA ONLY who are age 18 and over. Please read the Terms of Service and Disclaimer Policy before entering. You must be a PUBLIC FOLLOWER of this Blog to have your entries count in my giveaways. (Follow via Google Friend Connect) All non-blog followers will have their entries disqualified after the giveaway closes. This giveaway will close on January 3rd, 2014 at midnight EST time.


Disclaimer: Shelly Hill has personally reviewed the product listed above. Shelly has not received any monetary compensation for her review. Shelly did receive a free product to try out so she could evaluate and use it for her review. Her thoughts & opinions in this review are unbiased & honest and your opinions may differ. The Shakin N Bakin Blog is not responsible for delivery/shipping of giveaway items won from this blog nor are we responsible for mis-use or injury caused by items won from this Blog. Content on this blog is copyrighted, all rights reserved. We reserve the right to legally pursue anyone who violates our rights and/or steals our copyrighted material.

Monday, November 18, 2013

Chocolate Dipped Oreo Cookie Pops Recipe

Last weekend we had to attend a child's Birthday party and offered to make a treat & bring it along for the party. I decided to make some homemade chocolate dipped oreo cookie pops which were a big hit with the kids who were attending the party. These cookie pops are really easy to prepare and you can whip up a few dozen in just an hour.

Chocolate Dipped Oreo Cookie Pops

1 Pkg. Double-Stuff Oreo Cookies or Regular Oreo Cookies
1 - 2 Pkgs. Baker's Milk Chocolate (in Microwaveable Cups)
1 Pkg. Lollipop Sticks
1 Tube Cake Frosting
1 Pkg. Treat Bags with Ties or Ribbon Closures

Line two baking sheets with Parchment paper. Remove cookies from package and place on a large plate. Melt the Baker's chocolate in the microwaveable cups according to package directions. Stick the lollipop stick into the center of each cookie and then dip them into the melted chocolate. Hold them above the cup and let the excess chocolate drip back down into the container. Place cookie pops onto the baking sheets line with Parchment paper to get firm.

As you go along you might need to remelt and reheat the chocolate if it starts to harden. If you are in a hurry you can speed up the chocolate hardening process by placing the baking sheet into the refrigerator. If desired you can squirt some cake frosting (the kind in the tube) onto the cookie pops to make fun designs.

Once they are "set" and the chocolate is "firm" you can place them into clear cellophane food-safe bags. You can use the twist ties to secure them or use pretty ribbon like we did. The kids loved them and they are great as Birthday party favors.

Monday, December 17, 2012

Homemade Candy Cane Chocolate Bark Recipe

Are you looking for a quick and easy homemade holiday gift this season? If so, consider making this easy-to-prepare Candy Cane Chocolate Bark Recipe! You only need 3 ingredients to make it. Once it is completely done, put the piece of chocolate bark into glass mason jars, zipper closure food bags or in plastic containers. Decorate the containers and present them as a holiday gift.

You can basically make this recipe with milk chocolate, dark chocolate or white chocolate or mix a few chocolate flavors together. The choice is totally yours! In addition, you can swap out the peppermint candy canes and use other types of goodies like chopped nuts, M&M's, marshmallows, etc. 

Homemade Candy Cane Chocolate Bark Recipe


1 pound milk or dark chocolate
1 pound white chocolate
30 small peppermint candy canes


Put dark chocolate in a microwave bowl and heat on high setting in microwave 2 to 3 minutes or until chocolate is melted and smooth. Stir chocolate about every 30 seconds to make sure lumps are melting. Put white chocolate in microwave bowl and heat like dark chocolate. Put candy canes in a large freezer bag. Using a rolling pin break the candy canes into different size pieces. Place half the crushed candy canes in a strainer and shake small crumbs into dark chocolate. Place the remaining crushed candy into strainer and shake crumbs into white chocolate. Line a 9" by 9" square baking pan with heavy aluminum foil. Spread dark chocolate out into bottom of pan. Spread white chocolate over the dark chocolate in pan. Sprinkle the rest of the crushed candy canes over the top. Cover and refrigerate for about 2 hours. When hardened break up pieces of candy by dropping straight down on the counter.