Welcome To The Shakin 'N Bakin Blog!

Welcome to my blog! I love to cook and bake for my family. I hope you enjoy the recipes, foodie reviews, foodie giveaways and cooking tips posted on my blog.

How to Print Recipes: You can print out each individual recipe featured on this blog by clicking the "share" button at the bottom of each post. It will open up to show you options, click on print and another window will open up with the recipe inside it for printing. You can also use the SHARE button to email a copy of the recipe to yourself for printing later.

Showing posts with label Freezer Meals and Food. Show all posts

Wednesday, July 25, 2018

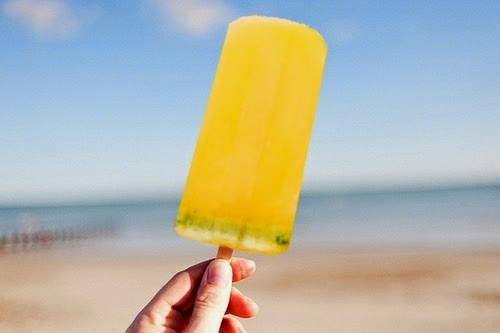
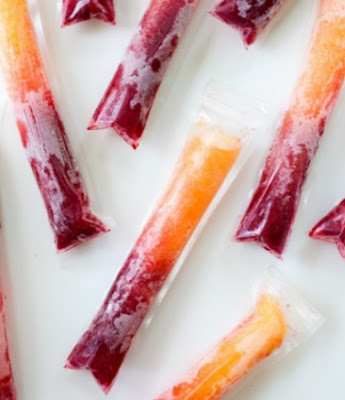
Delicious Raspberry Peach Pops Recipe

These homemade Raspberry Peach Pops are delicious! Please note, these ice pops contain alcohol and for adults only! Please keep them out of the reach of children and appropriately label them before placing them into the freezer to prevent accidental ingestion.

Today's guest post recipe is courtesy of Sparkling Ice. If you're looking for the plastic ice pop molds (wrappers), you can find them on Amazon if not available in your local stores.

Delicious Raspberry Peach Pops Recipe

Delicious Raspberry Peach Pops Recipe

Raspberry Layer:

1 cup frozen raspberries
1/4 cup Prosecco
1/2 bottle Sparkling Ice Grape Raspberry
2 tablespoons granulated sugar

Peach layer:

1 cup frozen peaches
1/4 cup Prosecco
1/3 bottle Sparkling Ice Peach Nectarine
2 tablespoons granulated sugar

To make the raspberry layer, purée raspberries, Prosecco, Sparkling Ice Grape Raspberry, and sugar in a blender until very smooth. Fill each popsicle mold ½ full with raspberry mixture. Freeze while you make the peach purée.

To make the peach layer, purée peaches, Prosecco, Sparkling Ice Peach Nectarine, and sugar in a blender until very smooth. Pour peach mixture over raspberry mixture to fill molds. Freeze until firm, at least 2 hours.

Sunday, July 15, 2018

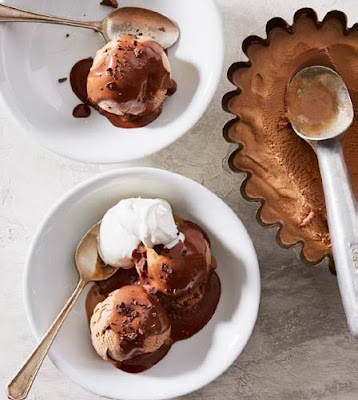
Monticello Chocolate Block Ice Cream Recipe

When visitors flock to some of America’s most iconic historic venues this summer, they’ll learn much about our nation’s history but also have the opportunity debunk the many legends and myths about chocolate. For example, did you know that cacao beans were used as form of currency dating back to the Aztec Empire, Christopher Columbus discovered America AND chocolate, bringing cacao beans back to the Spanish court in the early 1500s, George Washington drank “chocolate cream” at breakfast, Benjamin Franklin sold chocolate in his print shop, or chocolate has traditionally been included in military provisions throughout history?

This gem from the book Dining at Monticello may be the oldest American recipe for chocolate ice cream in print. Guests to Thomas Jefferson’s White House reported our third president enjoyed ending meals with a creamy dish of ice cream. The recipe will make approximately 6 servings.

Monticello Chocolate Block Ice Cream Recipe

Monticello AMERICAN HERITAGE® Chocolate Block Ice Cream

8 tablespoons AMERICAN HERITAGE® Chocolate Block
3 cups whole milk
1 cup heavy cream
1 vanilla bean
1 cup granulated sugar
Salt
6 large egg yolks

1. Finely grate AMERICAN HERITAGE® Chocolate Block onto a sheet of wax paper. Stir together the milk, cream and vanilla bean in a heavy-bottomed saucepan. Bring to a simmer over medium heat, stirring frequently.

2. Add the sugar and a small pinch of salt, stirring until dissolved. Gradually pour in the grated chocolate, stirring constantly, and continue stirring until completely melted.

3. Whisk the egg yolks in a medium bowl until smooth. Gradually beat in about 1 cup of the hot chocolate milk and slowly stir the egg yolks back into the simmering liquid. Cook, stirring constantly, until the custard is thickened enough to coat the back of the spoon. Remove from the heat and stir until slightly cooled, about 5 minutes. Remove the vanilla bean (it can be rinsed, dried and re-used).

4. Freeze in an ice-cream machine according to the manufacturer’s instructions until set but still a little soft. Scoop into a 3-quart mold, or several smaller molds, running the spatula through the ice cream and tapping the mold firmly to remove any air bubbles. Fill the molds completely. Cover and freeze until set, about 2 to 4 hours. The ice cream may also be set without molding it: scoop it into a freezer-safe container and freeze until set.

5. To serve molded ice cream, dip the mold briefly in hot water, or wrap briefly in a towel heated in a clothes dryer. Run a knife around the top edge to loosen the ice cream from the mold. Invert the mold over a serving dish and gently lift the mold from the ice cream. If not molded, serve in small scoops.

Recipe is courtesy of: AMERICAN HERITAGE Chocolate is an authentic historic chocolate made from ingredients available in the 18th Century. The recipe repre­sents a true taste of chocolate the way our ancestors would have enjoyed it. Made with all-natural ingredients and no preservatives, AMERICAN HERITAGE® Chocolate comes in four unique formats: chocolate sticks, chocolate bites, chocolate baking/grating blocks, and finely grated chocolate drink mix.

Sunday, May 7, 2017

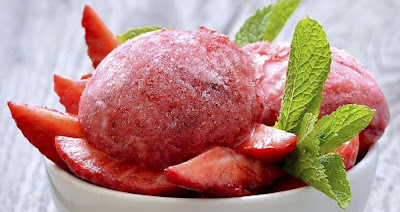
Easy Homemade Strawberry Sorbet Recipe

Strawberries...my favorite fruit in the entire world! I love strawberry flavored ice creams, pies, dessert cakes, pancakes, breads, beverages and more! Heck, I love just popping them into my mouth as a juicy snack too! If I could, I would eat strawberries every day, especially fresh ones! Yup, I love them that much!

Today I'm featuring a guest post recipe from Chef Anthony Stewart from Pritikin Longevity Center + Spa. It's super easy-to-make and delicious! I think you're going to love it.

Easy Homemade Strawberry Sorbet Recipe

1 cup strawberries (frozen)
2 tablespoons ginger juice (fresh)
1/2 teaspoon lemon zest
3 cups ice crushed
1/4 cup yogurt (plain, fat-free) (optional)

Combine all ingredients in a blender. Blend until smooth. Keep in the freezer. When ready to serve, simply scoop out servings.

Recipe Notes

* To make ginger juice, peel and grate several slices of ginger. Squeeze out the juice from the grated pieces into a small bowl. Or, if you prefer, wrap the gratings in cheesecloth before squeezing, and squeeze the juice through the cheesecloth.

** To zest a lemon, use a finer grater, like a Microplane. Simply rub the whole lemon in one direction against the little blades. Turn the lemon as you go so that you remove only the yellow part - the zest. You don't want the white pith underneath because it's bitter. The zest adds ZEST - a bright, piquant spark - to every dish.

Friday, December 30, 2016

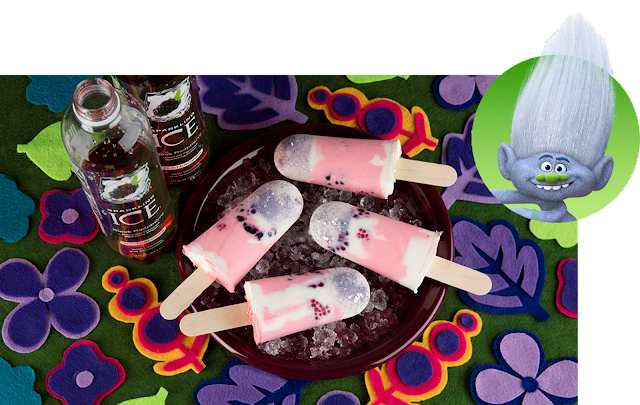
Black Raspberry Smoothie Pops Recipe

Black Raspberry Smoothie Pops Recipe
How many of you went out to the movie theater last month to see the Trolls movie? We haven't seen it yet, but as soon as it comes out onto DVD...we will. Anyway, in the meantime, we have a Black Raspberry Smoothie Pops Recipe to share with all of you that's courtesy of SPARKLING ICE. I bet these smoothie pops are delicious! The recipe makes 6 servings.

Guy Diamond Glitter Smoothie Pops

2 Cups Whole Milk French Vanilla Yogurt
1/4 Cup Sparkling Ice Black Raspberry
5-6 Fresh Blackberries, cut in half
6 Fresh Raspberries, cut in half
Edible Glitter, Sparkling Colored Sugar

In a small bowl, combine 1/2 cup yogurt with Sparkling Ice Black Raspberry; mix well and set aside. Add a layer of vanilla yogurt to the bottom of each popsicle mold. Add a layer of yogurt/Sparkling Ice Black Raspberry mixture and add 3-4 pieces of fruit to the mold. Finish each by dividing the remaining yogurt among the popsicle molds; use a knife or wooden skewer to swirl the mixture slightly. Insert popsicle sticks and freeze for at least 8 hours, or until completely frozen.

Before serving, run popsicle molds under warm water to release the popsicles. Allow popsicles to sit at room temperature for 2 minutes and immediately sprinkle or brush with edible glitter or sparkling sugar. Serve immediately or return to freezer until ready to serve.

Wednesday, October 19, 2016

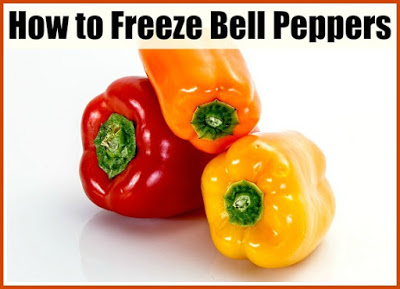
How to Freeze Bell Peppers

This past year my garden did extremely well, especially when it came to growing an abundance of fresh tomatoes, onions, zucchini, cucumbers and bell peppers. Seriously, this was the best crop and harvest we've had in at least the past 10 years.

I had a reader email me to ask how you can freeze bell peppers and after I answered her question, I thought I would also publish the instructions right here on my foodie blog for all of you.

How to Freeze Bell Peppers

Wash and towel dry your peppers. If you have any bad spots on them, you'll want to cut those away or totally toss it. Use a sharp knife to cut away the stem & core. Rinse them underneath cool running water to help loosen the seeds and membranes. Toss them away.

I like to prepare mine on a glass cutting board. I first slice them in half and then I slice them into strips or dice them into chunks, depending on how I plan to use them in the future. Every season, I make batches of both, but more strips than chunks, since we use our strips in a lot of stir-fry's, soups and stews.

Once you have them diced up or cut into strips, place them into a large measuring cup. I like to freeze mine in 2 cup portions, so I measure out 2 cups at a time. Pour them onto a baking sheet in a single layer and use paper towels to blot up any moisture that remains on them. Place the tray into your freezer for one hour to start the freezing process.

Remove from freezer and blog them again with paper towels. Pour into freezer bags (I use quart-size bags) or freezer containers. Purge out all of the air that you can. Seal the bag or container, label them appropriately and then freeze.

When you want to use them, you don't thaw them out at all! You simply remove as many that you need from your package and toss them into whatever it is your preparing. In addition, there is NO NEED to blanch them during the preparation/freezing process either. It's totally not necessary. Furthermore, freezing them does change their texture a little bit, so you don't want to toss them into a salad or eat them plan. They are meant to be used in your cooking, slow-cooker and baking recipes.

Wednesday, August 3, 2016

Chocolate Frozen Bananas with Pistachio Recipe

Now that summer vacation is upon us, it can be hard to find daily activities to keep our kiddos happy and entertained. Bringing your child into the kitchen to help cook is fun and it will help them gain appreciation for the foods they eat. Spork Foods has created an easy, sweet treat that your child will love to help you make…and eat! These Chocolate Frozen Bananas with Pistachio Chewy Bites are a great way to spend some quality cooking time with your kids.

Tip: Did you know… the oils on the inside of a banana peel will help reduce the itchiness and inflammation of a bug bite or poison ivy! Good to know!

Chocolate Frozen Bananas with Pistachio Chewy Bites
Serves 2-4

Ingredients:
4 pieces Setton Farms Pistachio Chewy Bites
1Ž2 cup non-dairy dark chocolate chips
Dash sea salt
2 large bananas

Peel bananas and cut each banana into 4 even pieces. Place a skewer in each banana and place in freezer to firm up, about 1-2 hours. Unwrap all chewy bites and chop until pretty fine. Set aside.

To melt chocolate, place chips in a heat-proof bowl over a small sauce pan filled with about 1 inch water. Or use double boiler. Melt until smooth and whisk.

Dip frozen bananas in melted chocolate and then roll in chopped Pistachio Chewy Bites. Place back in freezer to firm up about 1Ž2 hour, or until ready to eat.

Pistachio Chewy Bites: With two main ingredients, Pistachio Chewy Bites provide healthy snack lovers the amazing benefits of pistachios and cranberries in a delicious and nutritious bite-size bar. Pistachio Chewy Bites are heart-healthy, 100% all natural, gluten and dairy free, low in sodium, GMO free, vegan and a great on-the-go protein snack. They also have no cholesterol, zero trans-fat and are a good source of dietary fiber. These nutrient-rich snack bars provide a great balance of carbohydrates, protein and fat for sustainable energy. With 7 grams of protein, 3 grams of fiber and healthy fat, the individually wrapped bars are the perfect one stop shop.

Friday, June 17, 2016

Yonanas Banana Strawberry and Mango Ice Cream

Some of you may know...I own and manage another successful lifestyle blog called The Classy Chics and review a lot of products on that blog. Matter of fact, we discuss and feature a lot of recipes, crafts, beauty tips, home decor, health & wellness and all sorts of different topics & features.

Back on May 31st, I had the opportunity to review the Yonanas Ice Cream Maker which utilizes frozen fruit to make soft-server ice cream. You can use any type of frozen fruit that you would like and within minutes...you have a fruity cold treat to enjoy! You can check out my review and grab an additional recipe by reading my Yonanas Ice Cream Maker post.

Today...I'm featuring another recipe for all of you here on the Shakin 'N Bakin Foodie Blog.

Yonanas Banana Strawberry and Mango Ice Cream

2 frozen bananas
1/2 cup frozen strawberries
1/2 cup frozen mango chunks

Let your frozen fruits sit out at room temperature for 10 -15 minutes. Insert 1 banana into the Yonanas Ice Cream Maker, then your frozen strawberries, then 1/2 of another frozen banana, then the frozen mango chunks and finish it all up with the last 1/2 of banana. Once it's all in your bowl...stir it up together to blend all of the flavors.

If you like the consistency of soft-serve ice cream...enjoy it immediately. If you like your ice cream a little firmer, cover the bowl and place into the freezer for 30 minutes. I like to make up medium to large batches at one time and just freeze them for later use. This way my family can get in and grab what they want...when they want it! Enjoy!

Disclosure: Shelly received a complimentary Yonanas Ice Cream Maker to review and feature on her other blog. No monetary compensation was received.

Monday, March 7, 2016

No-Bake S'mores Ice Cream Cake Recipe

A few weeks ago we had a birthday party for a member in my family. As the hostess of the party I needed an easy-to-prepare birthday cake recipe that every person would enjoy. I headed on over to the Country Crock web site and found their S'mores Ice Cream Cake Recipe and decided to make that. Let me tell you...it was a huge hit! Since making it that first time...I've now made it three additional times and it never lasts long!

You can print the recipe directly from the Country Crock website or grab it below. Delicious!!!

No-Bake S'mores Ice Cream Cake Recipe

2 cups graham cracker crumbs
1/2 cup Country Crock® Spread, melted
1/3 cup sugar
1 package (12 oz.) semi-sweet chocolate chips
4 cups mini marshmallows, divided
1 cup 2% milk
1 cup crumbled graham crackers
1 container (1.5 qt.) Breyers® Chocolate Ice Cream
1 container (8 oz.) whipped topping

Combine graham cracker crumbs, melted Country Crock® Spread and sugar in medium bowl; press into 13 x 9-inch glass or ceramic baking dish. Microwave chocolate chips, 2 cups marshmallows and milk in small microwave-safe bowl at HIGH 4 minutes or until completely melted, stirring once. Cool 10 minutes, then stir in remaining 2 cups marshmallows. Spread over crust; freeze 1 hour or until firm.

Sprinkle crumbled graham crackers over chocolate layer. With scissors, cut carton from Breyers® Chocolate Ice Cream. Arrange Ice Cream on its side, then cut crosswise into 4 slices. Arrange slices in baking dish, pressing to form an even layer. Cover and freeze 4 hours or overnight.

Frost with whipped topping just before serving. Sprinkle, if desired, with additional graham cracker crumbs.

Disclosure: Recipe is courtesy of Country Crock. The photograph is copyright & courtesy of Shelly Hill ~ Owner of the Shakin 'N Bakin Foodie Blog.

Sunday, February 21, 2016

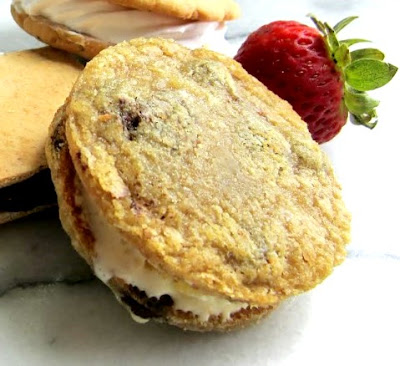
Brown Sugar Pineapple Ice Cream Sandwich Recipe

Looking for a decadent homemade dessert that will also cool you down? Tired of the same old, same old thing? If so, this guest post recipe is just for you! The recipe and photo is courtesy of Pastry Chef and Chocolatier, Erin Staton, Mirbeau Inn & Spa at The Pinehills - Plymouth, Mass. It will make 1 1/2 quarts.

Brown Sugar Pineapple Ice Cream Sandwich Recipe

1 qt. heavy cream
1 vanilla bean
8 egg yolks (pasteurized)
7 oz. granulated sugar
(see below for pineapple brown sugar addition)

For Pineapple Brown Sugar Addition Ingredients and Instructions:

1/2 cup light brown sugar
2 oz. butter, unsalted
1 lb. pineapple, diced small

In a sauce pan, melt butter and add brown sugar. Stir until melted. Add diced pineapple and cook until tender.Spread out on a sheet pan and allow to cool completely.

Heat cream with scraped vanilla bean in saucepan. Whisk together yolks and sugar. Slowly add hot cream to temper the yolks. Strain and cool over ice bath. Spin. Gently fold brown sugar pineapple mixture in and freeze.

To create an ice cream sandwich, ingredients are below for the Chocolate Chip Coconut Cookie:
Yield: 24 Cookies

1/2 cup granulated sugar
1/2 cup packed brown sugar
1 egg
1 tsp. vanilla extract
1 1/2 cups all-purpose flour
1/2 tsp. baking soda
¼ tsp. salt
1 cup semi-sweet chips
1/2 cup sweetened shredded coconut

Cream butter and sugars. Add egg and vanilla. Combine flour, baking soda and salt. Add chocolate chips and coconut. Spoon and roll into ball. Bake at 350 until golden brown.

Friday, October 9, 2015

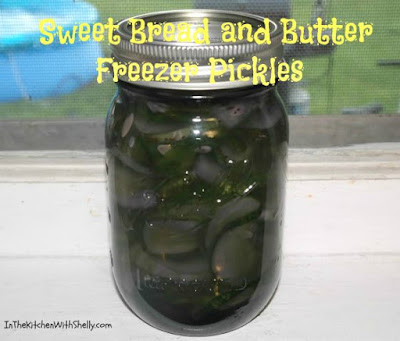
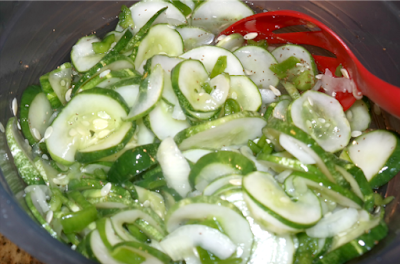
Grandma's Freezer Cucumber Pickles Recipe

When I was in my early teens my maternal grandmother started to teach me food preservation. This included: home canning, freezing and dehydrating foods she harvested from her backyard garden. As a young girl, I really didn't appreciate her knowledge but now that I am a mother & wife myself...I realize the full value of everything she taught me during those years.

One of the things that she taught me was how to make bread and butter sweet pickles. She taught me how to can them and also taught me how to freeze them. Today...I can sharing with all of you one of her super easy pickle recipes.

** Note: The reason my pickles look super dark in that glass mason jar is because I placed them in dark purple glass jars! Trust me...they look like regular pickles!

Grandma's Recipe for Cucumber Pickles

3-4 large or 6-8 small cucumbers
1 cup sweet onion, sliced or diced
1/4 cup green bell pepper, chopped
3 tbsp. pickling salt
4 cups granulated sugar
2 cups white vinegar
1 tsp. celery seed
1 tsp. ground turmeric
1 tsp. ground mustard (I use Colman's in the yellow tin)
4-6 plastic or glass freezer containers

Wash the cucumbers, onion and bell pepper; dry. Slice cucumbers into slices...we like our's thin so I usually do 1/8" to 3/16" slices. Slice onion or chop it into small pieces (according to your preference and chop the green bell pepper.

In a large mixing bowl combine together the sliced cucumbers, onion, green bell pepper and pickling salt. Stir until everything is well combined. Cover the bowl and refrigerate for 4 hours, stirring every 30 minutes and re-covering the bowl.

In a large mixing bowl combine together the granulated sugar, white vinegar, celery seed, ground turmeric and ground mustard. Stir until well blended together. Cover bowl and refrigerate for 4 hours, stirring every 30 minutes and re-covering the bowl.

Pour the cucumber mixture into a colander and run tap water over the mixture to rinse off the salt and to drain away all liquid. I like to let mine set in the colander for several minutes. Pour cucumbers back into their original bowl. Slowly pour the sugar and vinegar mixture into the cucumber & pepper mixture until well combined, stirring after each addition. Let this mixture sit for 10 minutes.

Spoon pickle mixture into freezer-safe containers leaving a 1" headspace in each container. Cover. Place them into the freezer. When ready to use...thaw them in the refrigerator overnight. Once thawed, they will keep for several days in the refrigerator. Do NOT let them sit out in room temperature for hours!

Print Recipe: You can print out this recipe by clicking on the SHARE button located at the bottom of this post. A new window will open. Click on PRINT and the recipe will load into the window for fast printing. Enjoy!

Tuesday, September 1, 2015

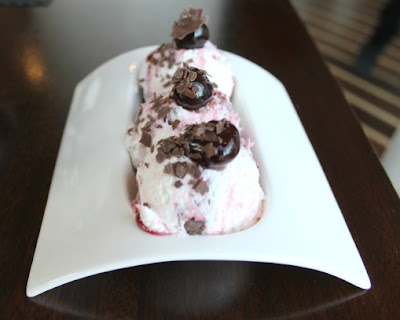
Black Forest Ice Cream Recipe

I own 2 different ice cream making machines and use them all of the time...all year long! My family loves great tasting homemade ice cream! Today, I am sharing this easy-to-make ice cream recipe with all of you. It's courtesy of Pastry Chef Brittani Szczecina, Palm Beach Marriott Singer Island Beach Resort & Spa. The recipe will make 3 quarts.

Black Forest Ice Cream Recipe

2 quarts heavy cream
12 oz egg yolks
1 lb. sugar
Pinch salt
1 cup Kirsch Liquor
½ cup Amarena cherries
½ cup raspberry jam
1 cup chocolate shavings

Bring half sugar, kirsch liquor and heavy cream to a boil. Temper the other half of sugar and yolks into the hot liquid. Cook to 178 degrees, strain and cool. Pour cooled mix into an ice cream machine and churn until semi thick, but still pourable. Swirl in the raspberry jam, cherries and chocolate shavings by hand. Portion into desired containers and let sit in freezer overnight. Scoop, garnish with extra cherries and shavings and enjoy!

Thursday, July 2, 2015

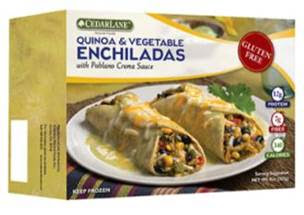
CEDARLANE Quinoa and Vegetable Enchiladas

Cedarlane has been making low-fat, all-natural frozen entrees for over 30 years. These award-winning entrees are easy-to-prepare, delicious and affordable.

Recently we were given the opportunity to try out the new Cedarlane Quinoa & Vegetable Enchiladas with Pablano Crema Sauce. These enchiladas are gluten-free and contain 12g of protein, 7g of fiber and only 340 calories per serving. Each enchilada is packed with quinoa, black beans, Monterey Jack and cheddar cheese as well as roasted Anaheim peppers, tomatillos, corn, bell peppers, onions, mushrooms, yellow squash, black olives, and zucchini—all topped with a delicious Poblano Crema sauce.

The frozen entrees can be prepared in a microwave oven (4 minutes) or in a conventional oven (25-30) minutes making them a quick option for busy people. On top of that, I think they are really nice for people who transport a lunch to work or for those of us who need something hot and on-the-go. We do a lot of traveling and I love stocking our freezer in the camper trailer with frozen entrees like this. I can easily prepare them in the microwave and have a hot dinner on the table within minutes.

Last week we needed something quick, easy and hot for lunch so I prepared both boxes of the Cedarlane Quinoa & Vegetable Enchiladas. As they were baking in the microwave my house started to smell sooooooooo good! That nice aroma really hyped up our taste buds before lunch even hit the table. Once they were done, we left them "stand" for 2 minutes per the package directions.

Right from the get-go we were really impressed with them. Sometimes frozen entrees will come out of the microwave either crunchy hard or very soggy. These came out of the microwave with the perfect texture. Next...the combination of flavors is absolutely AMAZING. Every bite had a new flavor sensation. Sometimes you tasted the quinoa and at other times the veggies. The Pablano Crema Sauce really topped them off nicely!

I would not hesitate in buying the new Cedarlane Quinoa & Vegetable Enchiladas. Matter of fact, I am going to look for them in my grocer's freezer section the next time I go grocery shopping. I think it would be nice to have several boxes of their entrees stocked in my freezer for when we need a quick bite to eat or will be out on the road traveling.

You can learn more about Cedarlane and all of the delicious foods that they make by visiting their site online and by connecting with the company on Facebook.

Disclaimer: Shelly H. has personally reviewed the product listed above. Shelly has not received any monetary compensation for her review. Shelly did receive a free product to try out so she could evaluate and use it for her review. Her thoughts & opinions in this review are unbiased & honest and your opinions may differ.

Sunday, June 14, 2015

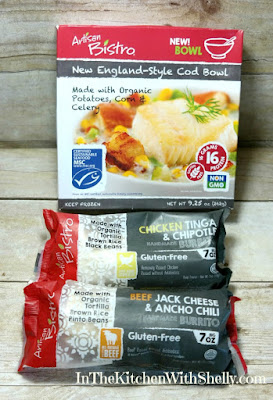
Delicious Meals from Your Freezer with Artisan Bistro

Did you know 1 in 133 Americans are diagnosed with Celiac Disease according to Celiac Central, leaving those with gluten intolerance in an on-going battle to find truly gluten free options for breakfast, lunch, dinner and everything in between!

Artisan Bistro offers a range of passionately-crafted, globally-inspired breakfasts, burritos, bowls, entrées and more made by artisan chefs, all crafted with a savory blend of 70 percent or more organic ingredients and sustainable proteins. Check out some of the products below that the company has to offer.

Seafood Bowls - the first entrée frozen food line in North America to earn Marine Stewardship Council ecolabel certification for sustainable, wild-caught seafood that touts wild-caught Alaskan salmon and cod, and wild pink shrimp. Available in 4 flavors.

Burritos - Featuring a savory blend of high-quality sustainable proteins, organic vegetables, grains and spices all wrapped in a one-of-a-kind organic gluten-free tortilla, for an elevated south-of-the-border lunch, dinner or snack. Available in 4 flavors.

Beyond Breakfast - Available in three vegetarian options and two varieties with all-natural turkey, these satisfying entrées blend the flavors of hearty breakfast favorites and can be enjoyed for breakfast, as a light lunch or a nutritious snack. Available in 4 flavors.

Recently we were sent three items from Artisan Bistro to try out for all of you. I am admitting up front, I don't personally have a problem with gluten being in my diet but my husband has developed a gluten intolerance over the past few years. We are contributing it to the aging process since he never had a problem until he was in his late 40's.

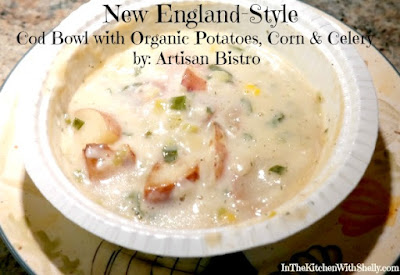
Last week for lunch I made him the Artisan Bistro New England-Style Cod Bowl for lunch. You can make this in your microwave oven which takes approximately 5-6 minutes or in your conventional oven which takes 35-40 minutes. I chose to make it in my microwave oven and followed the package instructions.

The Artisan Bistro New England-Style Cod Bowl is made with wild-caught cod (fish), organic potatoes, organic corn and organic celery. It's a one-serving bowl and each serving contains 16 grams of protein and 180 calories which makes it great for those who are watching their weight.

My husband was really impressed with this cod bowl and gobbled it down in rapid fashion. He couldn't believe that this was a prepared frozen meal and came out of our microwave oven. He has already added more of these to our grocery shopping list.

A few days later we made the 2 burritos that were sent to us for the review and prepared both of them using our microwave oven. My husband enjoyed the Chicken Tinga & Chipotle Burrito and I enjoyed the Beef Jack Cheese & Ancho Chili Burrito.

These burritos were delicious and had the perfect combination of flavors. What we also enjoyed abotu them is that they weren't hard & crunchy or soggy. Most of the time when you buy frozen burritos they either come out too crunchy or too soggy. The texture with both of these was spot-on perfect!

We will definitely be buying more of the Artisan Bistro products the next time we do our grocery shopping. You can learn more about the company and all of the different products that they make by visiting their site online.

Disclaimer: Shelly H. has personally reviewed the product listed above. Shelly has not received any monetary compensation for her review. Shelly did receive a free product to try out so she could evaluate and use it for her review. Her thoughts & opinions in this review are unbiased & honest and your opinions may differ.
Wednesday, June 10, 2015

Mint Citrus Mojito Popsicles Recipe

Bare's Basil Mint Citrus Mojito Popsicle combines some spring/summer flavors to make the perfect and refreshing organic and low calorie treat to cool you down and enjoy the warm weather (and you can easily leave out the alcohol to make a non-alcoholic version).


Mint Citrus Mojito Popsicles Recipe

12 fresh mint leaves
12 fresh basil leaves
1 3/4 cups Bare Organic Lemon Drop Mixer
1 1/2 T agave
1 cup crushed ice
2 T rum (optional)

Juice all of the citrus fruits. Combine all ingredients in a blender and blend until the leaves are chopped. Pour liquid into popsicle molds and freeze until solid.

Bare Mixers are a natural, low-calorie cocktail mixer used for margaritas, martinis, and so much more made with only the simplest and freshest ingredients including 100% real fruit juices, purified water, and organic agave syrup. Bare comes in a variety of mixers such as margarita, lemon drop and pomegranate cranberry cosmo that blend well with nearly any liquor or spirit or can also be enjoyed straight up on the rocks. Bare Mixers are free of artificial flavors, high fructose corn syrup, and empty calories. Each mixer is only 17 calories per ounce and 51 per serving, making Bare Mixers a much healthier option than other mixers on the market.

Wednesday, May 13, 2015

No-Churn Ice Cream Cookbook by Leslie Bilderback + Giveaway

Summer is finally here! If you’re looking for a cool, delicious treat on a hot day, or a fun activity to do with the kids, look no further than NO-CHURN ICE CREAM: Over 100 Simply Delicious No-Machine Frozen Treats; a mouthwatering collection of easy recipes for ice creams, sorbets, and gelatos - no ice cream machine necessary!

Crafted by culinary powerhouse Leslie Bilderback (author of the bestselling Mug Cakes), inside you'll find recipes for all the basic flavors, plus more complex and exciting flavors such as Pineapple-Peppercorn and Sweet Potato Marshmallow Swirl. All you need is a freezer, a whisk, a freezable container and a sweet tooth!

Title: No-Churn Ice Cream
Author: Leslie Bilderback
Publisher: St. Martin's Press
ISBN: 978-1-250-05438-8
Cover Price: $22.99

My Thoughts: I have to admit...we are ice cream junkies here at our home. We actually own 2 different ice cream making machines. With that said, there are days when I don't have a lot of time to whip up a quick frozen treat for my family. When I saw the title of this cookbook...I knew I had to review it for all of you.

There are 168 pages in this cookbook with over 100 simple & delicious no-machine needed frozen treats. Many have color photographs that accompany the recipe. There are recipes for the classics, add-ins, warm-weather ice creams, cold-weather ice creams, gelatos, sorbets, sherbets, other frozen desserts and there are several recipes for various toppings. Yup...something for everyone!!!

One of my family's favorites is a good batch of homemade chocolate ice cream. Every time I've made it in the past I've had to drag out my electric ice cream machine, assemble together a bunch of ingredients and then about 1 1/2 hours later we had our ice cream. Well...on page 16 in the cookbook the author shows you how to make classic chocolate ice cream without a machine! You only need 8 standard ingredients to make it. Oh my...impressive!

Further in the book you will find this recipe for homemade Rosebud Ice Cream. Yes...rosebud ice cream! That is definitely on my must-try list! I love how every recipe includes ingredients that I am familiar with, step-by-step instructions, variations and tips to help guide you through the preparation process. Anyone can make these recipes! I just love this book and I look forward to try many of the recipes throughout the summer season!

Purchasing Info: You can buy this book in paperback form or for Kindle from Amazon.com.

Giveaway: One lucky winner is going to win a print copy of No-Churn Ice Cream by Leslie Bilderback. The book will be shipped to the winner after the giveaway concludes.

Giveaway Details: This giveaway is open to residents of the USA ONLY who are age 18 and over. Please read the Terms of Service and Disclaimer Policy before entering. This giveaway will close on June 3rd, 2015 at midnight EST time.


Disclaimer: Shelly H. has personally reviewed the product listed above. Shelly has not received any monetary compensation for her review. Shelly did receive a free product to try out so she could evaluate and use it for her review. Her thoughts & opinions in this review are unbiased & honest and your opinions may differ. The Shakin N Bakin Blog is not responsible for delivery/shipping of giveaway items won from this blog nor are we responsible for mis-use or injury caused by items won from this Blog. Content on this blog is copyrighted, all rights reserved. We reserve the right to legally pursue anyone who violates our rights and/or steals our copyrighted material.
Thursday, November 13, 2014

Raspberry Green Tomato Freezer Jam Recipe

When I was a little girl...I used to sit in the kitchen and watch my grandmother make large batches of Raspberry Green Tomato Jam. Most of the time she canned them but every once in awhile she would turn them into freezer jam which is super easy to do.

Now that our gardening season is coming to an end...I have been really busy making up fresh batches of raspberry green tomato freezer jam for my family. I typically get 7 to 10 half-cup servings every time I make a batch. It will depend on the size of your tomatoes of course! Here is grandma's recipe.
Raspberry Green Tomato Freezer Jam Recipe

5 to 6 cups chopped green tomatoes
boiling water
3 cups granulated sugar
2 boxes red raspberry gelatin mix

Wash and chop up your fresh green tomatoes. I normally use 7 to 10 large green tomatoes which gets me 5 to 6 cups of chopped green tomatoes. Toss them into a pan with hot water, just enough water to cover them. Bring to a boil, stir in the granulated sugar and reduce heat. Simmer mixture on low for 15 to 20 minutes. It is done when everything is soft and squishy. Use a potato masher to mash up the pulp as it cooks...unless you like it chunky. Also, I fish out any tomato skins that float to the top as it cooks down.

Stir in the raspberry gelatin mix until all ingredients are well combined. Simmer over low heat for an additional five minutes. Turn off heat and let mixture sit in the pan for 5 to 8 minutes and then spoon it into freezer-safe containers. Label and freeze. They will keep for up to 1 year.

Thursday, November 6, 2014

Orange and Green Tomato Freezer Jam Recipe

We have finally harvested the last of our tomatoes for this gardening season. We are really fortunate this year that we started getting ripe tomatoes the end of June and clear through the month of October here in Pennsylvania.

Since I don't like to waste food...I decided to make up several batches of green tomato freezer jam with a fruity taste. This particular recipe is my grandmother's Orange & Green Tomato Jam Recipe and it's delicious! You do NOT taste the tomatoes at all and its really easy to make!

This jam will harden up nicely once you freeze it and let the gelatin set. It is great on toasted bagels, rolls or use it as a fish or chicken marinade throughout the winter season. Once it has been cooked, you can let it cool and freeze it in freezer containers or can it via the water bath method with your home canner.

Orange and Green Tomato Freezer Jam Recipe

5 to 6 cups chopped green tomatoes
boiling water
3 cups granulated sugar
2 boxes orange gelatin mix

Wash and chop up your fresh green tomatoes. I normally use 7 to 10 large green tomatoes which gets me 5 to 6 cups of chopped green tomatoes. Toss them into a pan with hot water, just enough water to cover them. Bring to a boil, stir in the granulated sugar and reduce heat. Simmer mixture on low for 15 to 20 minutes. It is done when everything is soft and squishy. Use a potato masher to mash up the pulp as it cooks...unless you like it chunky. Also, I fish out any tomato skins that float to the top as it cooks down.

Stir in the orange gelatin mix until all ingredients are well combined. Simmer over low heat for an additional five minutes. Turn off heat and let mixture sit in the pan for 5 to 8 minutes and then spoon it into freezer-safe containers. Label and freeze. They will keep for up to 1 year.

Note: You can print out this recipe by following the "print" instructions listed at the top of my blog.

Wednesday, October 29, 2014

Slow Cooker Pear Sauce Recipe

How many of you love apple sauce? How many of you have tried pear sauce? Well, if you have never tried pear sauce but love applesauce, I think you will love it and it is very easy to make! Now, I don't list out the amount of ingredients because we just taste test it and make it according to our own taste buds.

Slow Cooker Pear Sauce Recipe

20 to 30 fresh ripe pears
1 to 2 teaspoons lemon juice
ground cinnamon
granulated sugar
water

Remove skin, seeds and core from pears. Chop them up into pieces and place into your slow cooker. Add just enough water to cover the pears. Stir in the lemon juice. Cover and cook on high for one hour, reduce heat to low and cook for 3 additional hours.

Use a ladle and spoon out all of the water. Spoon pears into a blender or food processor. I use a NINJA. Cover and blend for about 10 to 15 seconds. Remove lid and stir in ground cinnamon and granulated sugar according to your own taste buds. Cover and blend for an additional 10-15 seconds. We like ours very creamy. If you like it chunky, blend less.

Let it cool in the blender container to room temperature. You can then spoon it into freezer containers and freeze or you can home can it into mason jars. You will want to follow your canner's processing instructions for applesauce and make it the same way.

Sometimes I can mine (good for up to 1 year) and sometimes I freeze it like I did last week. I find it will last nicely in my freezer for up to 6 months. I like to freeze in 1/2 cup and 1 cup portions since there are no preservatives in it...I don't like to thaw out big batches and waste any.

To Thaw: Remove from freezer and place in the refrigerator overnight. Once thawed, it will keep for about 3 days.

To Print Recipe: Click on the share button located at the bottom of this post. A new window will open. Click on PRINT and the recipe will load into the window for printing. Enjoy!

Sunday, September 7, 2014

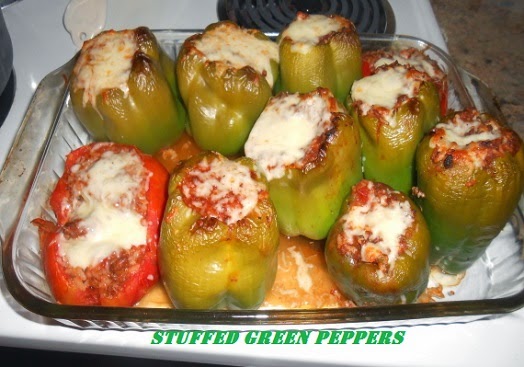
Homemade Stuffed Green Peppers Recipe

We planted a big garden this year and surprisingly, everything did well. Matter of fact, we had an abundance of green bell peppers! I ended up freezing some for later use and I also made up several batches of homemade stuffed green peppers and froze them too. Here is how we make ours.

You can use this same recipe when stuffing large red or green tomatoes too! Plus, if you let them cool completely, you can freeze them in containers for later use. I keep mine for 4 to 5 months in the freezer.


Homemade Stuffed Green Peppers Recipe

6 to 8 large green bell peppers
1 lb. lean ground beef
1/8 cup finely chopped onion
1 small can diced tomatoes with juice
1 medium can tomato sauce
2 cups uncooked white rice
1 tablespoon basil
1/2 teaspoon parsley
1 teaspoon oregano
1/4 teaspoon salt
1/4 teaspoon ground black pepper
1/2 cup shredded cheese (your favorite)

Wash bell peppers, remove stem & seeds, set aside. Cook up the white rice until almost done. It should be el dente. Drain away water and set aside.

In a large frying pan simmer the lean ground beef with the finely chopped onion over medium heat until beef is done. Drain away grease, set aside. In a large mixing bowl combine together all of the above ingredients EXCEPT for the shredded cheese. Spoon filling into the shells of the green bell peppers or into the shells of large tomatoes.

Preheat oven to 350 degrees. Place peppers and/or tomatoes into a large baking dish and bake in the oven for 25 minutes. Remove. Top each pepper or tomato with shredded cheese. Place baking dish back into the oven for 3 to 5 minutes to melt cheese. Remove and serve immediately.

Thursday, August 28, 2014

Homemade Chocolate Ice Cream Recipe

We love making homemade ice cream and one of the best investments we have ever made was in our Cuisinart Automatic Frozen Yogurt-Ice Cream & Sorbet Maker (machine). Our old ice cream maker was a total dud but this one from Cuisinart is my absolute favorite!!!

A few days ago we made up a batch of the Simple Chocolate Ice Cream and it was delicious! This recipe is courtesy of Cuisinart and can be found in their recipe booklet that comes with the machine. The recipe will make approximately 5 cups of ice cream (ten 1/2 cup servings).

Simple Chocolate Ice Cream Recipe

3/4 cup cocoa powder, sifted
1/2 cup granulated sugar
1/3 cup packed dark brown sugar
pinch of salt
1 cup whole milk
2 cups heavy cream
1/2 tablespoon pure vanilla extract

In a medium mixing bowl, whisk together the cocoa powder, sugars and salt. Add the milk and using a hand mixer on low speed or a whisk, beat to combine until the ingredients are dissolved and mixed together. Stir in the heavy cream and vanilla extract. Cover and refrigerate for 1 to 2 hours or overnight.

Turn the Cuisinart ice cream maker on; pour the mixture into the frozen freezer bowl and let mix until thickened, about 15 to 20 minutes. The ice cream will have a soft, creamy texture. If you want it firmer place it into the freezer for about 2 hours. Remove from freezer 15 minutes before serving.

* Note - We don't do that because we like "soft serve" ice cream.